
DIY Hurricane Using FrogTape®
This is a Sponsored post written by me on behalf of FrogTape Brand Painter’s Tape. All opinions are 100% mine.

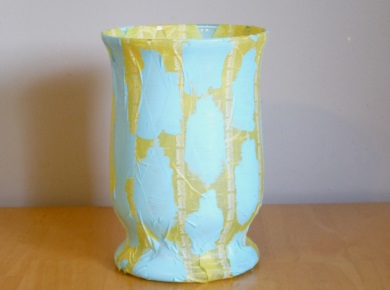
I painted this hurricane using FrogTape® Shape Tape™. It was a little bit challenging at first due to the curvy shape of the hurricane, but once I figured out what I was doing I got on a roll and was able to complete the project fairly quickly.
(FrogTape® is the only painter's tape treated with PaintBlock® Technology. PaintBlock is a super-absorbent polymer which reacts with latex paint and instantly gels to form a micro-barrier that seals the edges of the tape, preventing paint bleed. Check out thisFrogTape how-to for more details.)
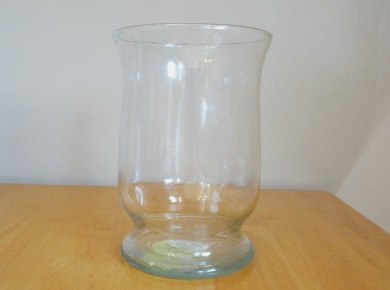
Step 1: Start with a clean, dry hurricane or vase.
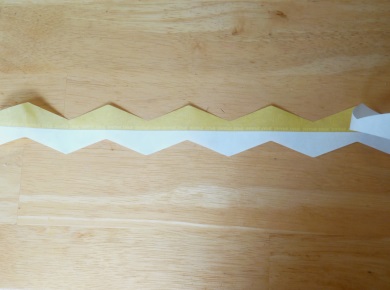
Step 2: Measure and cut pieces of FrogTape® Shape Tape™ to create the design you have chosen. Peel off one half of the backing.
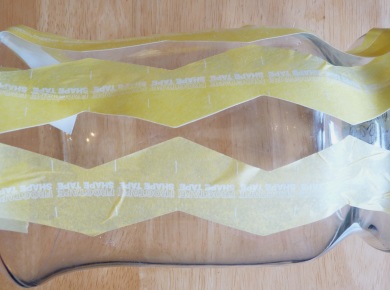
Step 3: Adhere the tape to your hurricane. Continue until you have completed your desired design.
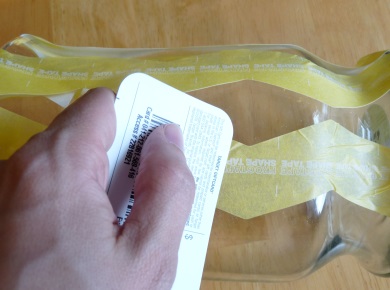
Step 4: Remove the other half of the backing and secure the tape firmly with your fingers. Then use a firm plastic object to smooth the edges of the tape. (I used an old gift card.)
Step 5: Ensure that your design looks exactly like you want it, then paint directly over the tape to fill in the bare design.
Step 6: After the paint is dry, remove the tape from your project and enjoy the finished product!
I had fun trying out a new project. What project would you like to try using FrogTape® Shape Tape™? You can find tons of creative inspiration when you follow FrogTape® on Twitter @FrogTape!