Quantcast
Blog - Page 104 of 128 - Imperfect Homemaker

Organizing a Small Space

As the new year rolls around, the internet is abuzz with resolutions, weight loss, and organizing goals. It is a great time to take a step back and evaluate the year ahead!
Before the new year gets too busy, lets take a moment and look at implementing some organizing habits into our daily lives.

organizing for small spaces

I enjoy organizing – taking a space, rethinking it, and deciding how that space could be better used. This time of year usually presents a problem, however… since I have recently been gifted new things, I have to find a place for those items as well! While I certainly don’t mind receiving new things, I am very limited on space. I’ve developed a few “rules” that work well for me in my organizing endeavors!

1. Evaluate the space. Sometimes a space is not used to its maximum potential simply because it is not being used in the best way it could be. Yes, bookshelves are traditionally used to store books…but could the space be better used a different way? With all the cute cubbies and baskets these days, there is a ton of potential to use things in different ways. Try a few things and see what works best for your space!

2. Purge…and I mean, PURGE! As time goes on, I’m getting more and more annoyed with stuff. Christ warned us about this in Luke 12:15, “And he said unto them, Take heed, and beware of covetousness: for a man’s life consisteth not in the abundance of the things which he possesseth.” Christ goes on to tell a parable {an earthly story with a heavenly meaning} that gives us an example of this attitude…and closely parallels society today! The man in the parable had so much bounty that he had to tear down his barns and build bigger. He didn’t realize that he was quickly nearing the end of his life, and that none of his stuff would be of any value to him anymore!

Our mindset in 2013 is much like this rich man. We build bigger houses, or garages, or rent storage units simply to store stuff that doesn’t matter for eternity. Think of all the time, money, and energy we could be using on the eternal if we weren’t spending it all up on the temporary.

With that mindset, I am ruthless when it comes to getting rid of things. If I haven’t used or worn it in the last 6-12 months, it gets donated or sold. Growing up my mom implemented this same idea – if we got a new toy, and old one had to be either rotated out or donated.

Look around – I bet you can find many things to purge out of your home, leaving you with more space for the things that you really need.

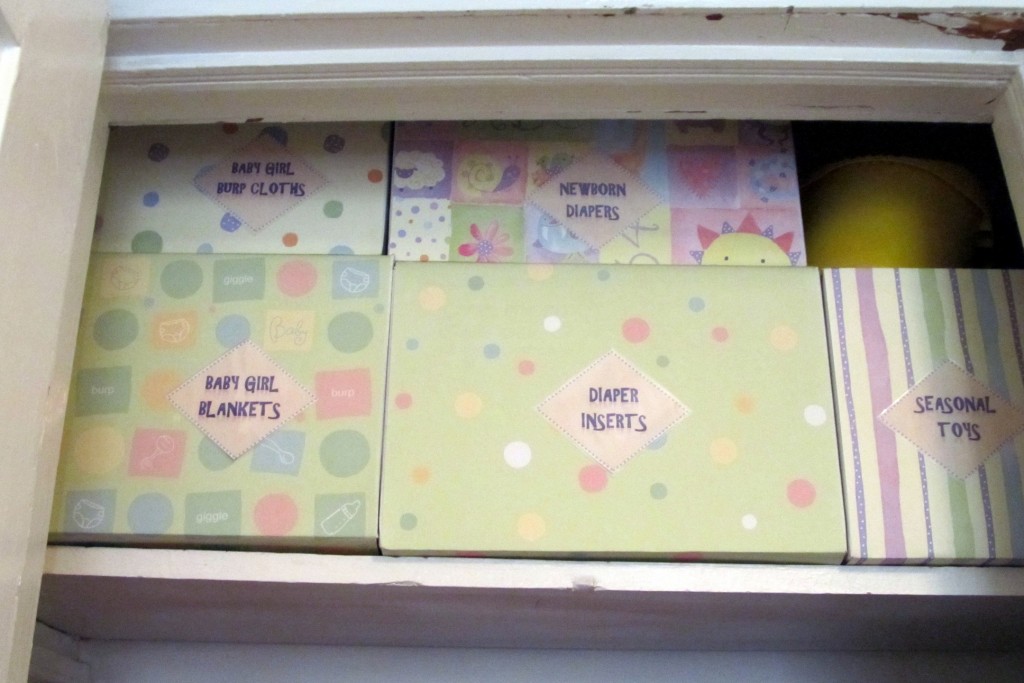
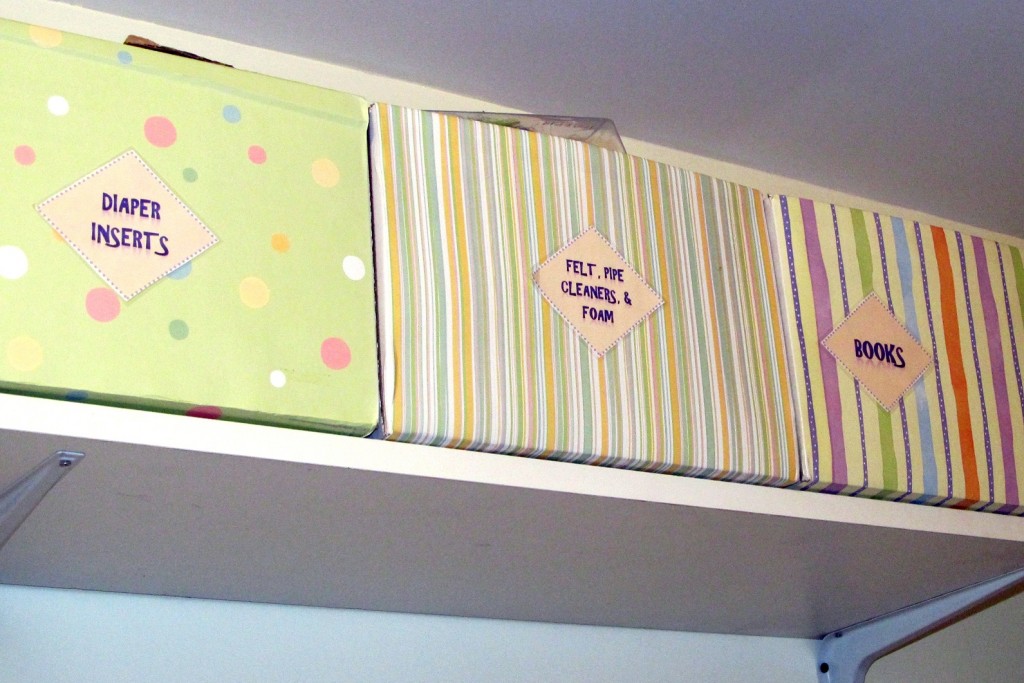
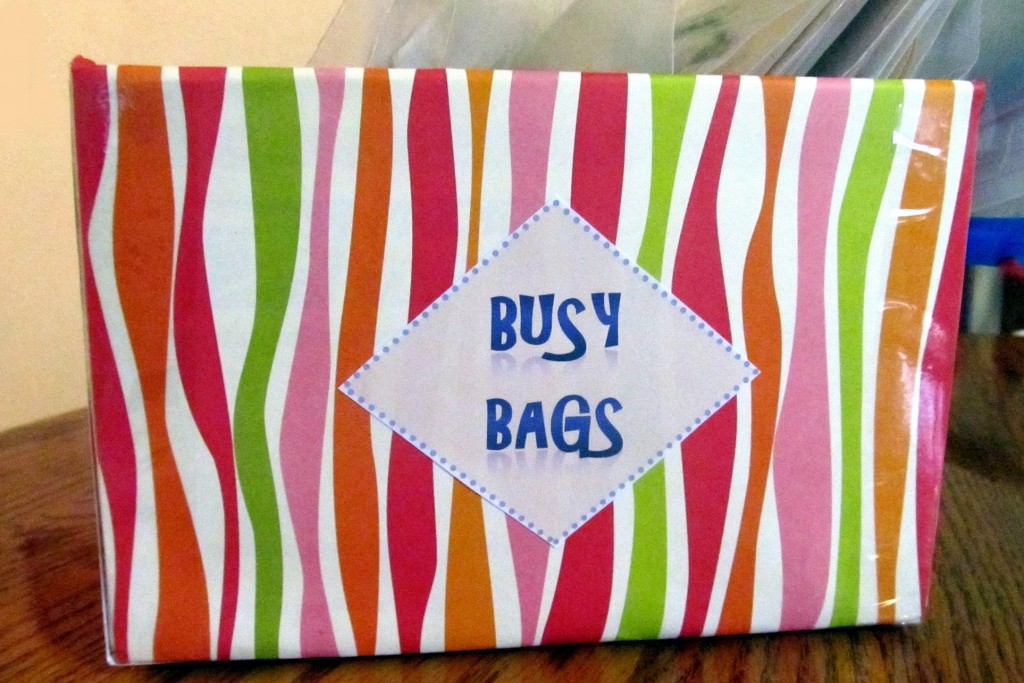
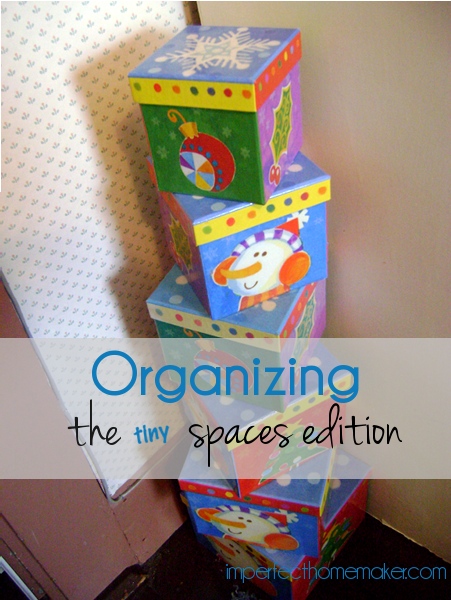
3. Use every available space. I have a teeny tiny bedroom that has to house me, my clothes, my library, and my small sewing business. I’ve learned to maximize the space and use every inch of it!

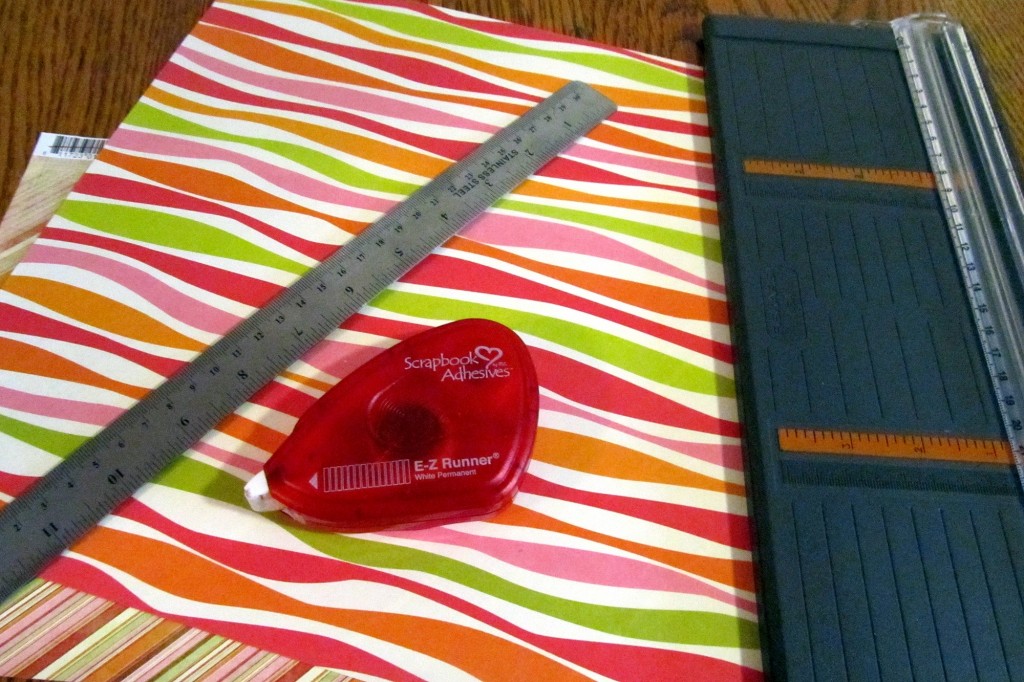
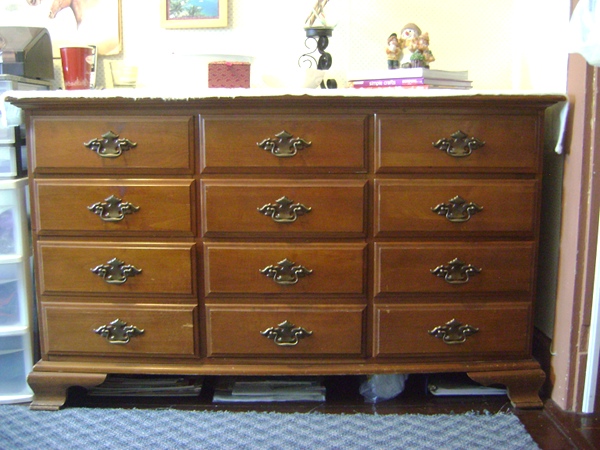
There is a little bit of space under my dresser…big enough for some narrow items like my scrapbooking paper and some packaging items for my business. {don’t mind the dust…}

store things under dresser

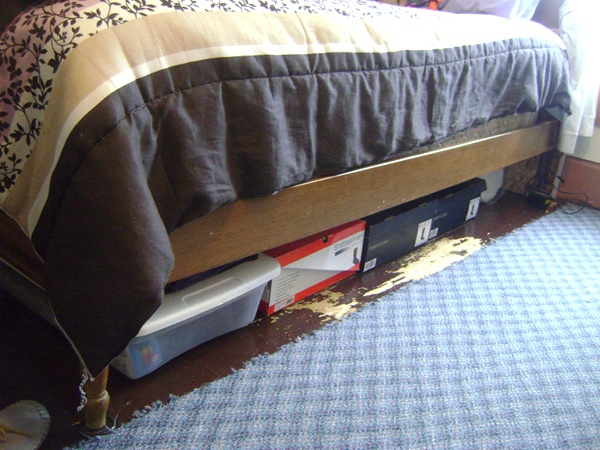
Stashing things under the bed has a bad connotation – but if you are doing it as an organizing endeavor, I think it is ok. {wink!} I have several narrow boxes that hold my shoes, all my handbags and purses, plus more business supplies and fabric. Rarely used items get placed in the back, while the every day stuff is nicely lined up at the front. My bed packs more storage too – behind the headboard I store a large board and cutting mat that gets pulled out to make my bed a workspace!

store things under the bed

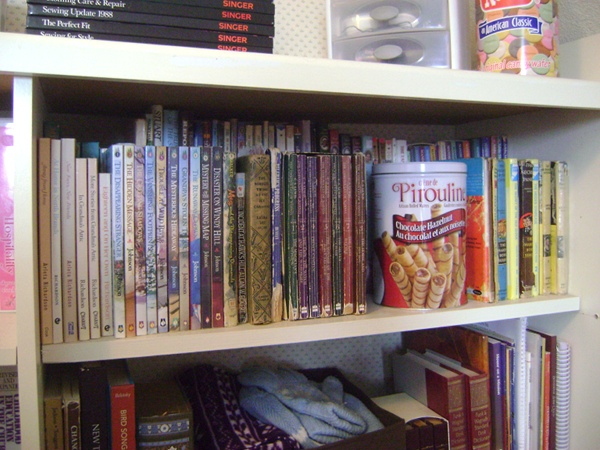
I have quite a few books, and while I’d love to have a nice, big built-in to fit them all in perfect {still dreaming up plans for that!} for now I have to get by with a smaller bookcase. It is deep, however, so I utilized that and have two rows of books on some shelves. I used cereal boxes covered in scrapbooking paper to give the back row a boost, so I can clearly see what books are behind there!

two rows of books

4. Remember that your “loss” can be someone's gain. Find creative ways to rid your home of the things you don’t need, and perhaps bring in a few items that you can use.

  • We have a great little non-profit store in our area that accepts donations. We enjoy shopping there as well, and have been able to get many items that were needed for a very low price. Donating locally is a great way to help your community!
  • Right now the ladies in our church are having a swap. Anyone can bring in items they don’t need any more, in exchange for something you see that you would like to have! I got rid of several items this way, and was able to pick up a couple of craft books in exchange. You could organize this with some friends – it is almost like getting a yard sale experience for free! 🙂
  • Selling used items online is very popular these days. Here in Canada we have Kijiji, but Craigslist is the same thing. I was able to sell two large bags of scrap fabrics that I couldn’t use – giving me some spending change to fuel my fabric addiction, ha!
  • Simply give. Do you know of a family that is struggling or could just use some encouragement? It is not a bad thing to give away your used items. It doesn’t need to be a big charity event, just a simple, “I can’t use this anymore, could you?” will be sufficient. Clothing especially is something that can be given away! Just be sensitive to the needs of the other person…don’t give things that are junk or that they won’t be able to use. You can still give from the heart, even if the item is used.

The Bible commands us to be good stewards of the things God has given us, and I believe that includes taking care of even the small things in our life. The better we care for our things, the longer they will last us. What methods do you have to organize or purge your things? Anyone else have the challenge of a small space to work with?

Organizing a Dual-Purpose Room

I have in my home, like some of you have, a dual purpose room. It’s my piano studio. No, wait- it’s my living room!

It’s both. And it presents an organizing challenge.

I’ve taught private piano lessons in 3 of our homes since we’ve been married, and it’s taken some trial and error to figure out what works best when it comes to keeping the teaching room company clean.  I sometimes have parents stopping by to make a tuition payment, so even on days when I’m not teaching, the living room needs to be presentable.

My children are used to what happens on my teaching days; they know it’s time to clear the living room of all toys. They are my main clutter control for this dual-purpose room! As a rule, I try to keep this room simplified from extra “stuff,” so when it’s pick-up time the main jobs are toy pick-up, vacuuming, and dusting.

I’m going to share some pictures of the metamorphosis of this room. I’ll also be sharing some tips to keeping a dual purpose room looking professional, yet comfortably livable.

This is a shot of the studio part of our living room from about a year and a half ago:

H&H Blog 250

My teaching supply shelf was originally bright and colorful:

H&H Blog 245

The side wall held my white board, calendar,  and progress charts:

H&H Blog 248

Then I added the giant fishbowl to keep track of scales…and added musical notation charts:

H&H Blog 255

Last year’s set-up was workable. However, this fall I decided that the piano studio was taking over the living room. It felt more professional than it did livable. Also my array of supplies was visually distracting. I began to wonder if company thought they were in a living space or a professional space.  I’ve made a few small changes that made a big difference! Here is a shot of my teaching space as it is right now:

DSC_0476

I took down the charts and added some homemade musical art above the piano. I also moved my music cabinet and replaced it with houseplants.

So when people come into my living room/studio, this is what meets the eye:

DSC_0510

(A simple shoe space and a maritime welcome.)

The photo below gives a glimpse of the room from the door. Notice that you can see all the way through the dining room and kitchen to the back door! I try to keep that visual line clutter free as much as possible. (I’m noticing my daughter’s teapot pony house on the floor there…just keeping it real, eh?)

DSC_0486

The top of the piano is attired in simple decor as well- just a few items that inspire me and that I hope will inspire my students. I like to use items that are enjoyable for me personally even when I’m not teaching:

DSC_0505

I swapped out the green bookshelf (pictured above) for a smaller, wooden one. I also swapped out the colorful supply baskets for some brown weave baskets. My intent was for them to blend in to the surroundings a bit better- to be a bit more “living room-ish” and a bit less “piano studio-ish.” I use my laptop while I teach to record notes in Music Teacher’s Helper, so the computer is a permanent fixture:

DSC_0479

Directly to the right of the bookcase are my notation posters, progress charts for children, and the ever-handy white board:

DSC_0483

In a different corner of the room is my music lending library that used to be to the left of the piano (pictured above). It is functional, yet not distracting to my goal of a homey living room:

H&H Blog 244

So there you have it- my dual purpose room. Some of you may have a piano studio/living or dining room as well. Or perhaps you have a photo studio that shares your home. Remember that it’s the small things that make the biggest difference in a room!

The key to maintaining a dual-purpose room is to find a balance with the decor and the practical items that are implemented into the room. The goal for this type of room is to have a professional feel during the “business” times, and a comfortable, homey feel during the casual times. And above all else, the main focus should be to present a well-ordered home as a good testimony for Christ and for all who enter.

“Let all things be done decently and in order.” 1 Corinthians 14:40

15 Minute Tasks for the Week

Organize and Clean

Well, it's week three of 15 Minutes a Day to a Clean and Organized Home!  I hope you're starting to notice some small changes around your house.  If you're just joining us or if you've missed some days, no problem!  This program is set up so that you can just jump right in where you are.

Last week we worked on disinfecting the bedrooms, and this week we're going to focus on organizing them.  I'll be focusing specifically on my kids' rooms, but feel free to work on the master bedroom or guest room if that's what works for you.

Be thinking ahead how to best organize your bedrooms so that you can be gathering the necessary supplies.  Andrea posted a very inexpensive way to make matching organizational bins.

Monday

Head into the room with a trash bag and three boxes.  Set the timer for 15 minutes and begin a purge of the room.  Work your way around the room clockwise and go through every closet, drawer, nook, and cranny.  Throw away any trash, add anything you do not need to one box to be donated or sold.  Add anything that belongs in another room to the other box to be put away.  In the third box, place items on which you are undecided.  You may think you can't bear to part with something, but by the end of the week you may realize it's time to let it go.  (Don't focus too much on cleaning out the clothes unless you readily see something you know you need to get rid of.  We'll be spending a couple days dedicated to just clothing later on.)


Tuesday

Continue with another 15 minutes of purging.  If you finished one bedroom on Monday, work in another bedroom.

Wednesday

Set the timer for 15 minutes and work on organizing one closet shelf or drawer.  Place like items together in bins or baskets.  Over-the-door shoe holders work well for holding small items such as small toys, scarves and accessories, or hey, even…shoes!  If you're working in a child's room, organize the room in such a way that is easy for children to keep organized themselves.  Label dresser drawers or toy bins (use pictures if they can't read) so that children can put their items away in the correct places all by themselves.

Thursday

Work for another 15 minutes on organizing another area of the room.

Friday

You guessed it!  Another 15 minute organizing session in the bedroom!

Saturday

Take 15 minutes to wrap up loose ends in the bedroom.  If you have boxes of things that you haven't decided what to do with, now is the time to make a decision.  Decide where the items belong and put them away, or put them in your donate box.


How did you do last week?  Did you get those bedrooms disinfected?  It makes you feel wonderful when you walk into the room, doesn't it?

If you're just joining us, you'll probably want to email updates or follow along on Facebook so you can keep up with each week's new tasks.


Easy & Frugal Organization for Children’s Activities or Craft Supplies

I love to be organized.  I like everything to have a place so I can easily find and access it when I need it. I really like all of the pretty boxes and organizing systems that you can find in the stores today.  However, most of them cost a pretty penny.  When you are living on a very tight budget, it’s hard to squeeze out anything extra for something aesthetic.

Last year when I wanted to re-organize my children’s closet, including the numerous art & craft supplies that we own, I really wanted everything to look pretty.  But I didn’t have any extra money to spend on the project.  That’s when I came up with an easy and frugal method of organizing and displaying all of the supplies in the closet.

Nursery Makeover

Basically, I used boxes of the same size and covered only the front of the box with scrapbooking paper.  I then made matching labels for each box so that I could quickly know the contents.  The boxes stacked neatly and looked nice because they were all the same size.  The decorative paper made them look pretty and match the room decor.  Since only the front of the box could be seen when they were stacked on the shelf, covering just one side of the box in pretty paper was quick, easy, and economical.

 Easy & Frugal Organization

I used some boxes that were leftover from a home internet business.  However, I have seen boxes for 50 cents or $1 at Lowes or Wal-Mart.

Here are the supplies you will need:

Easy & Frugal Organization

  • Scrapbooking/decorative paper.  You can wait for a sale or use a coupon to get these for 10-25 cents per sheet.  As a paper crafter, I had a lot on hand already. The 12×12 size would be best.
  • Adhesive – I used scrapbooking adhesive, but you could also use hot glue or just packaging tape
  • Ruler
  • Paper cutter

Instructions:

Using the ruler measure the width of your box.  Cut your scrapbooking paper to the width of the box using the paper cutter.  Now place the paper on the box, and fold the excess paper to overlap the flap of the box on the top, and the bottom of the box.  Remove your paper and add adhesive near the fold lines and all of the edges.  Place the paper back on the box, folding the ends around the box, and adhere.  I sometimes add some clear tape to the edges of the box if I am planning to use it frequently.  This keeps the paper edges from getting ruffled.  Depending on the strength of your adhesive, you may want to tape the ends of the paper on the box flap and box bottom to ensure they stay in place.

Easy & Frugal Organization

I create custom labels using this tutorial from IHeartOrganizing.  I use Microsoft Word as opposed to Excel.  It’s very easy to create a shape, customize the color & border, and add some word art.  After printing you can laminate the label for added durability.

Easy & Frugal Organization

That’s it!  You have just created visually appealing storage boxes for $1-$1.25 each (or less), as opposed to $3-5 each for plastic bins, or even more for fabric storage bins.

A New Year – Refresh and Organize

Refresh and Organize

1. Prepare an habitation for the Lord and ask Him to direct your steps. We cannot do this unless we know Jesus Christ as our personal Saviour. He alone is the way, the truth and the life. John 14:6 Jesus saith unto him, I am the way, the truth, and the life: no man cometh unto the Father, but by me.
2. Plan your method of organization and stick with it. However, if plans need to change, don't stress over it, but accept it as God's divine intervention. His way is best! Psalms 18:30 As for God, his way is perfect: the word of the LORD is tried: he is a buckler to all those that trust in him. Isaiah 30:21 And thine ears shall hear a word behind thee, saying, This is the way, walk ye in it, when ye turn to the right hand, and when ye turn to the left.
3. Put your husband and children before your home. Don't be so focused on organization and decluttering that you neglect your wonderful family that God has given you. They will vanish quickly. Pay attention and ask God to show you what/who is important. He can help you to set your priorities. Proverbs 31:27-28 She looketh well to the ways of her household, and eateth not the bread of idleness. Her children arise up, and call her blessed; her husband also, and he praiseth her.
4. Pay Attention to God's Word and meditate upon it. Here are some Scriptures to think upon:

  • Exodus 15:2 The LORD is my strength and song, and he is become my salvation: he is my God, and I will prepare him an habitation; my father's God, and I will exalt him.
  • Psalms 71:3 Be thou my strong habitation, whereunto I may continually resort: thou hast given commandment to save me; for thou art my rock and my fortress.
    • Psalms 132:3-5 Surely I will not come into the tabernacle of my house, nor go up into my bed; I will not give sleep to mine eyes, or slumber to mine eyelids, Until I find out a place for the LORD, an habitation for the mighty God of Jacob.

5. Place a song in your heart. Consider some of the following songs regarding God's Guidance and your devotional life.

Summary: Do you want to be refreshed this year? According to Webster's Dictionary this means to give new strength to; to invigorate; to relieve after fatigue; as, to refresh the body. As we give our day to God He will strengthen and invigorate us for the day. Do you want to be organized this year? Psalms 71:1 In thee, O LORD, do I put my trust: let me never be put to confusion. Trust the Lord to direct your day. He is ever faithful and will never leave or forsake you. May you have a refreshing and organized 2013!

15 Minute Tasks for the Week

Organize and Clean


This week was incredibly full.  Full of unforeseen events, that is!  The older kids were sick all week, and the baby was teething, and I was doing good to even get a shower much less do any organizing or cleaning projects.  When they started feeling a little better, and I began to put the house back in order, we had last-minute overnight guests for the weekend.  So, with my head hung in shame, I have to report to you that I didn't do any of last week's assignments.

On the bright side, however,  I did do a whole lot of other deep cleaning projects.  You see, when my kids are sick, I get frantic about ridding the house of any possible germs.  I spent any free moments scrubbing their bedrooms and the bathroom floor to ceiling with disinfectant, and washing all their bed linens, curtains, and furniture.  Did it help them get better any faster?  I have no idea.  They did stay sick with runny noses and coughs all week, but they didn't get any worse than that.  I've heard plenty of stories from others in my church, and even from my Facebook friends in different states, how nasty the viruses are that are going around this year, and how long it's been taking people to recover.  Would my family have gotten to that point had I not tried to stop the germs in their tracks and boost their immune systems at the first signs of any sickness?  Maybe, maybe not.  But I didn't want to find out.

Anyway, now that I'm done rambling, I'm going to assign you some of the same tasks this week.  These are things that will need to be done at some point in the year anyway, so you might as well do them during cold and flu season!

Monday

Take down and wash curtains and bed linens in the bedroom(s) of your choice.

Tuesday

Clean ceiling fans in all bedrooms and knock down any cobwebs from the ceiling.

*Helpful tips for cleaning ceiling fans*

  1. Use an old pillowcase to clean the fan blades.  Just slip it over the blade, grip it tightly, and slide it back off of the blade.  The dust will be contained inside the pillowcase instead of floating around in the air.
  2. Clean the rest of the fan with a swiffer duster or a damp rag.
  3. Keep a spray bottle of water handy, and spray the air around the fan as you dust.  The mist will help the dust particles fall to the floor instead of floating around in your face and making you sneeze.  (I tried this for the first time this week, and was amazed that I had no problems with sneezing, itchy eyes, sore throat, etc. like I almost always do when I'm around dust.)

Wednesday

Mist bedroom walls with a non-toxic disinfectant.  Scrub any smudges, crayon drawings, etc. off with a rag.

Thursday 

Move bedroom furniture out from the wall.  Dust the baseboards and spray with disinfectant.  Vacuum the entire floor, including underneath of the furniture.  If you have a wood floor, sweep and spray the entire floor with disinfectant.

Friday

Spray all bedroom furniture (dressers, bed frames, etc.) with a non-toxic disinfectant and wipe down with a rag.  Empty trash cans and spray with disinfectant before replacing the liner.

Saturday

Move quickly through all bedrooms and remove any items that do not belong there.  Place them in the correct places in the house, throw away trash, and get rid of things you no longer use.


*I am happy to post the recipe for my homemade non-toxic disinfectant if anyone is interested.  Just leave me a comment if you would like it.


How did you do on last week's assignments?  Whether you got them all done or had a week like mine where it just didn't happen, I'd love to hear about it!