Spring Children’s Craft: Coffee Filter Butterflies
The following is a post from our contributor, Andrea.
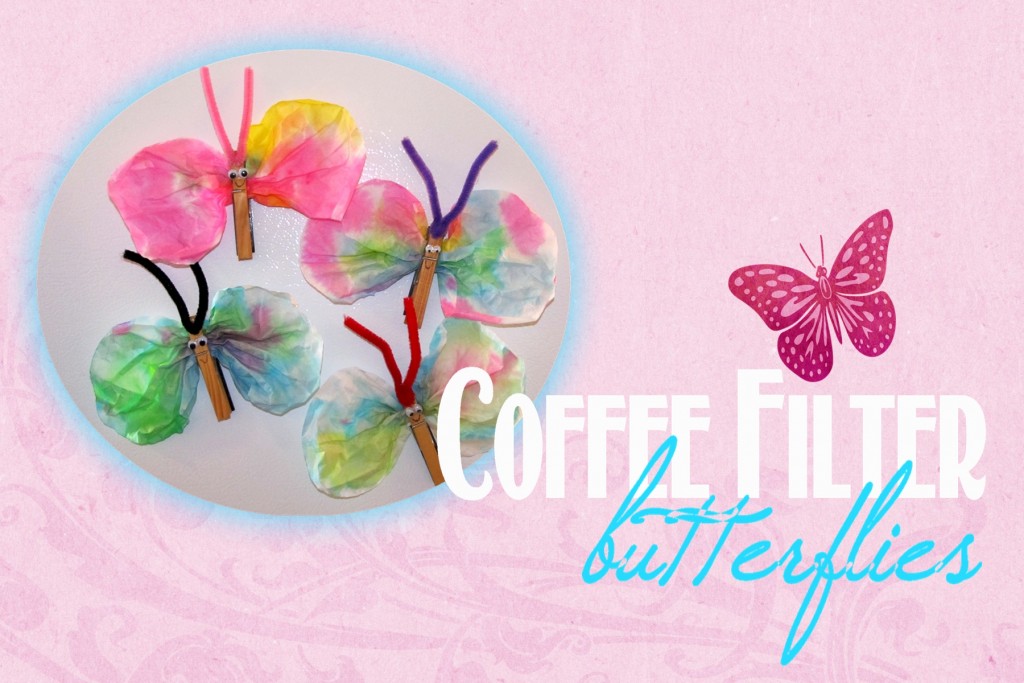
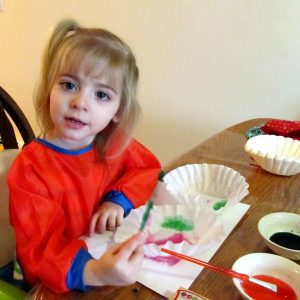
My little girl loves doing crafts. Anything that involves glitter, paint, glue, or coloring is right up her alley. Since it has been cold, and my husband takes the car to work each day, we have been “stuck” indoors with cabin fever! I've been trying to spice up our daily routine by sprinkling some crafts and new activities into the week. Recently we made a very simple craft: coffee filter butterflies. (I have an 18 month old and a 3 year old, and both were able to do this craft. I only helped with the gluing).
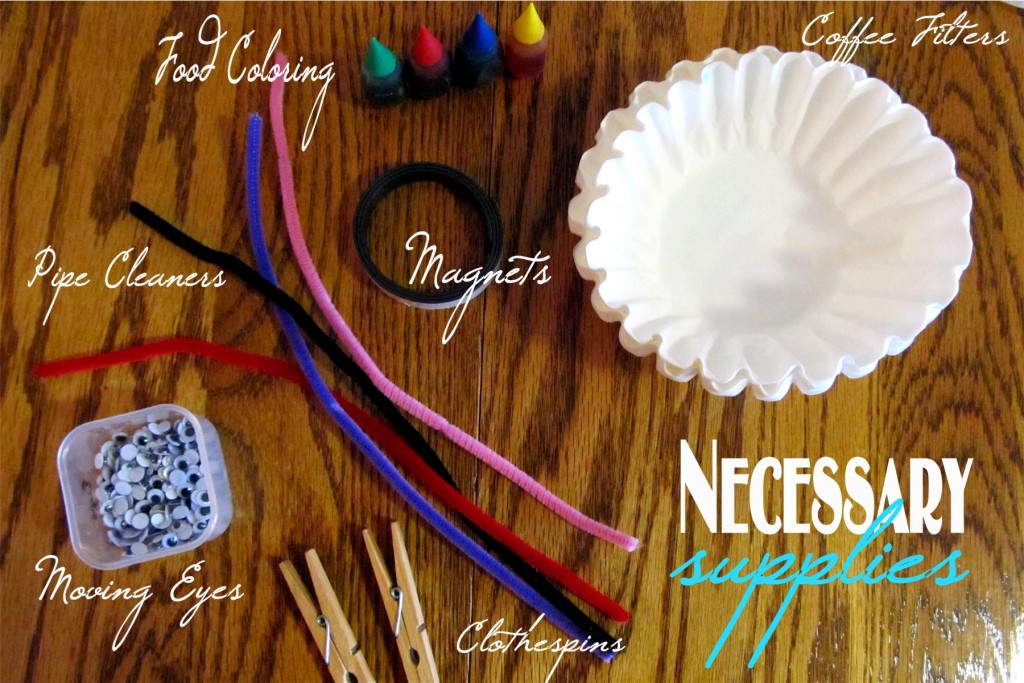
Supplies:
- Coffee filters
- Food coloring
- Small bowls or Dixie cups
- Paintbrushes
- Clothespins (one for each butterfly)
- Pipe Cleaners
- Moving eyes (optional)
- Magnets (optional)
If you have older children you can use Elmer's glue or craft glue. My kids are young and impatient, so I used a hot glue gun to put their butterflies together. If you are pressed for time, you can use a hair dryer to speed up the drying process after the filters are “painted.” We split our craft into two segments – one before lunch, and one after nap time.
Directions:
1. Prepare the area. I have a plastic table cloth I place on the table when we are crafting, and my kids wore paint smocks since we were using food coloring. I also had a box of baby wipes and a roll of paper towel handy…which my son put to good use.
2. Mix colors. In each small bowl or cup add 1 Tablespoon of water. Then add several drops of food coloring. The more food coloring, the more vibrant the color will be on your coffee filter.
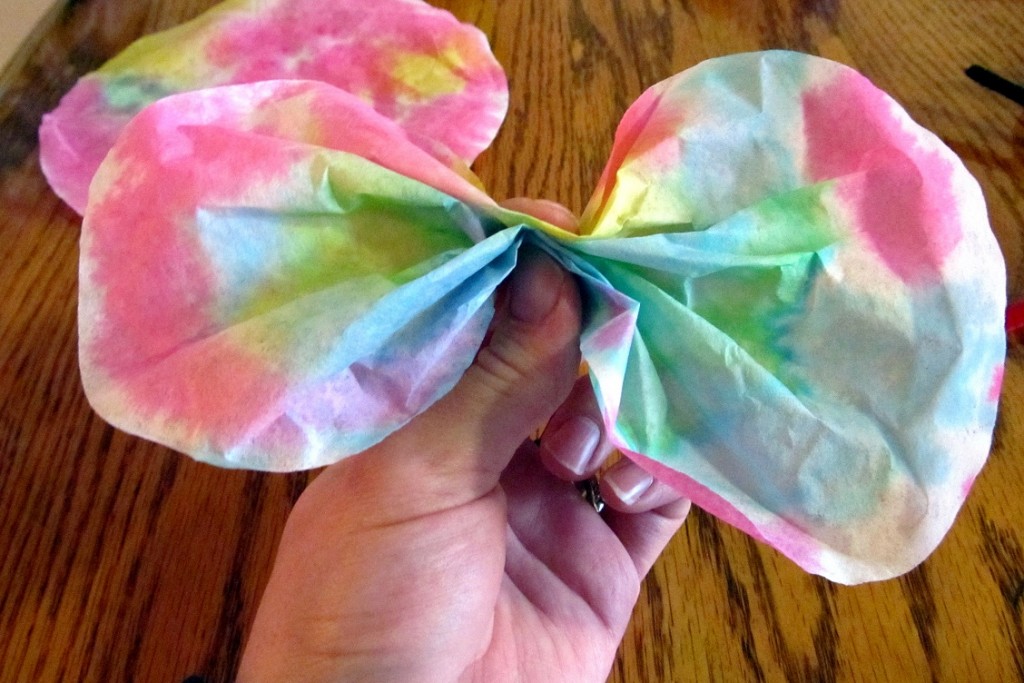
3. Paint. I placed a paper towel under each coffee filter to help absorb the excess water. I flattened the coffee filter and then let my kids use the paint brushes to drop the colored water onto the filters. Then we hung the filters up to dry. {I used clothespins to clip them to a hanger over the bathtub}. Let the filters dry completely. We painted before lunch, and completed the butterflies after nap time. You can speed up the process with a hair dryer if needed.
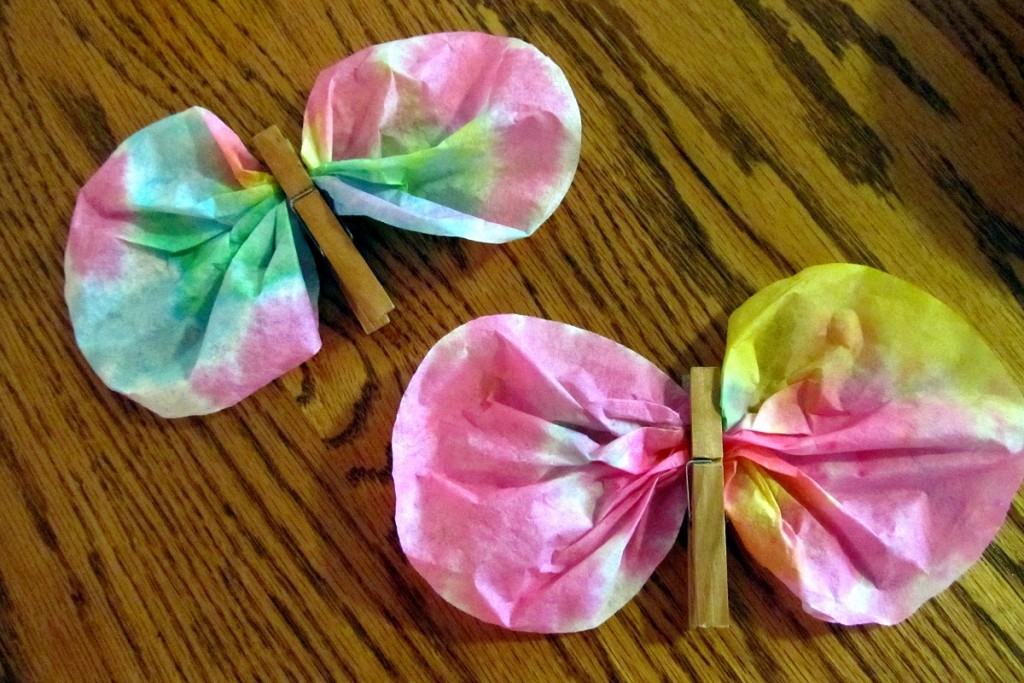
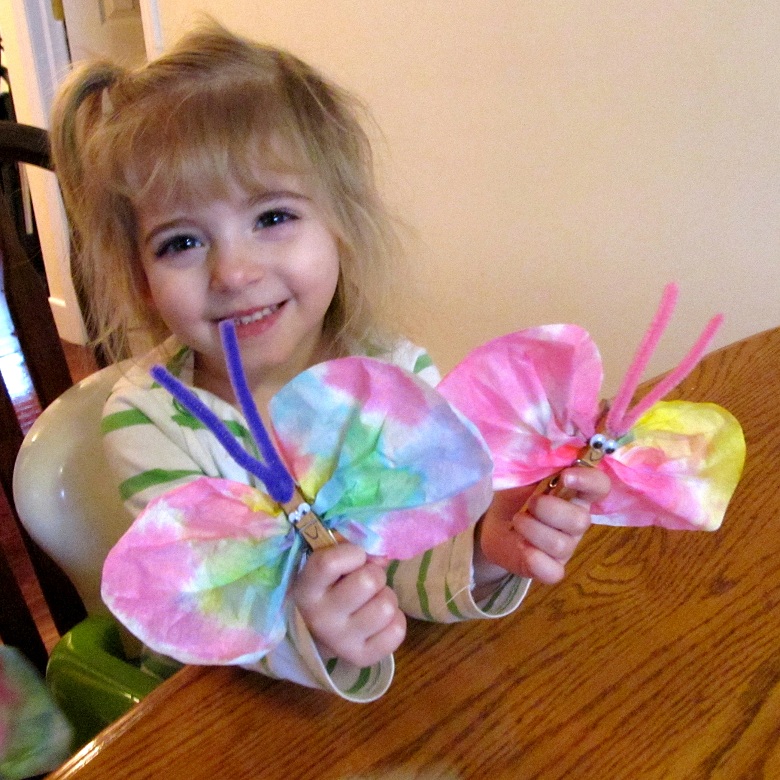
4. Assemble the butterfly. Scrunch the filter up in the center so that it will clip inside a clothespin. The clothespin is the body of the butterfly. You can have older children paint the clothespin if you want, but my kids were too little for that. I added some hot glue to keep the filter inside the clothespin, because I knew my son would try to take it apart. We cut each pipe cleaner in half, and then folded the piece into a “v” to form the antennae We glued it onto the clothespin, along with some moving eyes. My daughter insisted that the butterfly needed a mouth, so we added that detail with a Sharpie marker. Add a magnet strip to the back of your butterfly if you want them to hang on the fridge.
That's it! It's a simple craft, but my kids had fun creating a mess with the colored water, and then getting a butterfly out of it. They also like playing with magnets on the fridge while I am working in the kitchen.
15 Minute Tasks for the Week
If you’re just joining us this week, this program is set up so that you can jump in right where you are! You may want to subscribe to email updates or follow along on Facebook so you can keep up with each week’s new tasks.
We're back after a couple week's break from our 15 minute cleaning and organization tasks.
This week we're going to finish up in the bathroom.
Monday
You get to skip Monday since I'm late getting this up! 🙂
Tuesday
Head into the room with a trash bag. Work your way around the room clockwise and go through every shelf, drawer, nook, and cranny. Be sure to go through products in your shower, look through your makeup, etc. Don't skip anything. Be honest with yourself and throw away items that you don't use.
Wednesday
Set your timer for 15 minutes and begin organizing one shelf or drawer at a time. Place like items together and use baskets or bins to hold smaller items. Check out my Organizing board on Pinterest for more ideas.
Thursday
Work for another 15 minutes on organizing your shelves, drawers, and cabinets.
Friday
15 more minutes of organizing, and you should be finishing up in the bathroom.
Saturday
Make a list of projects that you would like to complete in the bathroom as well as the materials needed. Maybe it's hanging new towel hooks or doing some redecorating. Get it all on paper so that you will be more motivated to get it done.
Is your house starting to look clean and organized? Just think, we haven't even finished three months of the year — you'll be able to accomplish a whole lot more by the end of the year!
Quick Update
I'm afraid I may end up rambling around with this post. I've gotten out of the groove of blogging after not having any internet for a week.
I'm still alive over here, though, and hope to get back into the routine tomorrow.
It's 3:45 pm, and as much as I love and appreciate my readers, you're not #1 on my list on priorities. (Sorry to break that to you.)
My husband and I were talking a couple nights ago about how we can actively, intentionally reach some spiritual goals. Instead of saying, “I wish I would spend more time reading and memorizing God's Word and praying; I wish I would be a better spiritual teacher to my kids, etc.”, we tried to come up with an action plan to actually fulfill those desires.
I also asked my husband if there is anything I can do to help him grow spiritually.
The main thing right now that would be the biggest help to him is to get myself well physically. (I'm working on that, and praise the Lord I found some doctors who really “get it” and who will spend as much time with me as they need to in order to get these crazy hormones of mine balanced out and take care of the resultant autoimmune conditions, nutritional deficiencies and chronic fatigue syndrome.)
As the foreman at a cabinetry shop, he often puts in 12 hour days, then comes straight home to help me finish up housework and laundry and sometimes cook supper. He's always worn out, and as I talked about in my last post about our healthy living journey, he doesn't always get a lot of nutrition from his food. That doesn't leave him much time or energy to spend time with the Lord, even though he does make every effort to find times throughout the day to do so. If I can get to where I can take care of all the household responsibilities again, he will have a lot of time in the evenings to spend with the kids, spend time with the Lord, and simply rest and be rejuvenated.
But today is not one of my “bad days”. I am feeling fairly well. I don't want to be sitting at a computer screen when I can be a blessing to my husband by getting a healthy supper cooked at a reasonable hour so he can be strengthened with food, rest from the responsibilities of a long day at work, spend time with his children, and get to bed at a decent hour so that he can be awake and alert during his morning time with the Lord.
So, after a little rambling, I'm off. Off to be a blessing to my husband, thanking the Lord for this opportunity today, and praying that soon this will be the norm.
I’ll Be Offline For a While
A curious little 18 month old turned off the power strip where the modem was plugged in. When I turned the power back on, somehow it fried my modem. I have no internet for the time being until I can get the modem replaced. Be back soon!
Organizing a Small Space
As the new year rolls around, the internet is abuzz with resolutions, weight loss, and organizing goals. It is a great time to take a step back and evaluate the year ahead!
Before the new year gets too busy, lets take a moment and look at implementing some organizing habits into our daily lives.
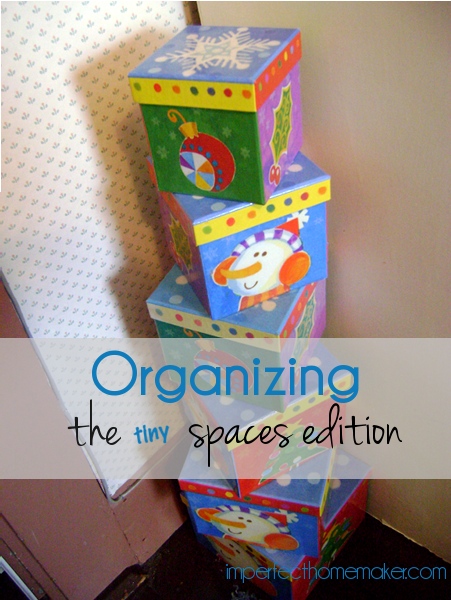
I enjoy organizing – taking a space, rethinking it, and deciding how that space could be better used. This time of year usually presents a problem, however… since I have recently been gifted new things, I have to find a place for those items as well! While I certainly don’t mind receiving new things, I am very limited on space. I’ve developed a few “rules” that work well for me in my organizing endeavors!
1. Evaluate the space. Sometimes a space is not used to its maximum potential simply because it is not being used in the best way it could be. Yes, bookshelves are traditionally used to store books…but could the space be better used a different way? With all the cute cubbies and baskets these days, there is a ton of potential to use things in different ways. Try a few things and see what works best for your space!
2. Purge…and I mean, PURGE! As time goes on, I’m getting more and more annoyed with stuff. Christ warned us about this in Luke 12:15, “And he said unto them, Take heed, and beware of covetousness: for a man’s life consisteth not in the abundance of the things which he possesseth.” Christ goes on to tell a parable {an earthly story with a heavenly meaning} that gives us an example of this attitude…and closely parallels society today! The man in the parable had so much bounty that he had to tear down his barns and build bigger. He didn’t realize that he was quickly nearing the end of his life, and that none of his stuff would be of any value to him anymore!
Our mindset in 2013 is much like this rich man. We build bigger houses, or garages, or rent storage units simply to store stuff that doesn’t matter for eternity. Think of all the time, money, and energy we could be using on the eternal if we weren’t spending it all up on the temporary.
With that mindset, I am ruthless when it comes to getting rid of things. If I haven’t used or worn it in the last 6-12 months, it gets donated or sold. Growing up my mom implemented this same idea – if we got a new toy, and old one had to be either rotated out or donated.
Look around – I bet you can find many things to purge out of your home, leaving you with more space for the things that you really need.
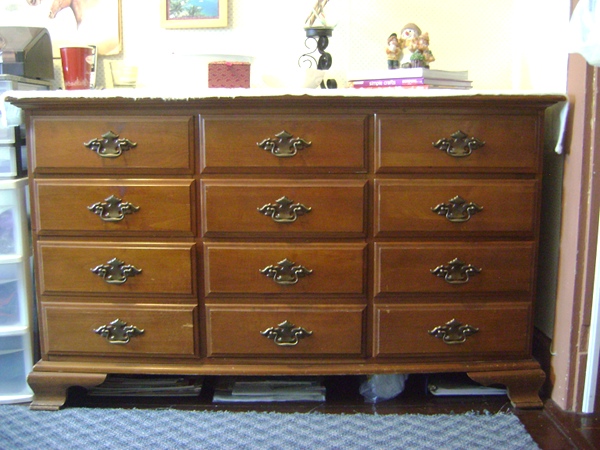
3. Use every available space. I have a teeny tiny bedroom that has to house me, my clothes, my library, and my small sewing business. I’ve learned to maximize the space and use every inch of it!
There is a little bit of space under my dresser…big enough for some narrow items like my scrapbooking paper and some packaging items for my business. {don’t mind the dust…}
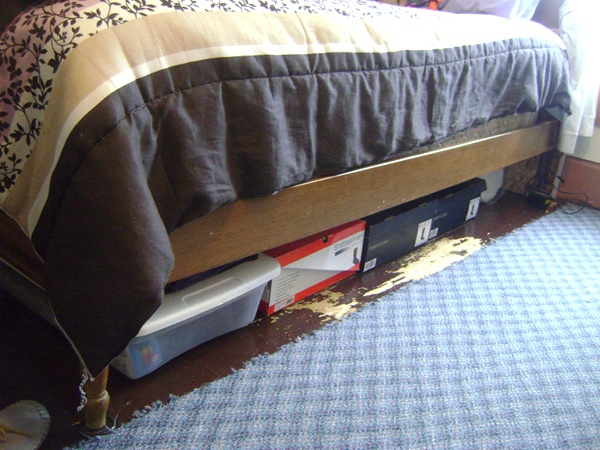
Stashing things under the bed has a bad connotation – but if you are doing it as an organizing endeavor, I think it is ok. {wink!} I have several narrow boxes that hold my shoes, all my handbags and purses, plus more business supplies and fabric. Rarely used items get placed in the back, while the every day stuff is nicely lined up at the front. My bed packs more storage too – behind the headboard I store a large board and cutting mat that gets pulled out to make my bed a workspace!
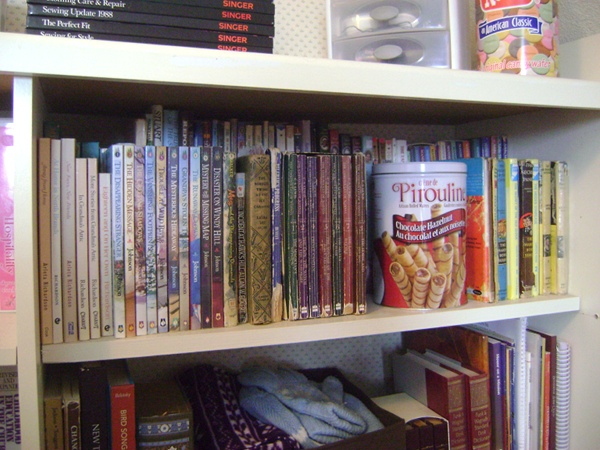
I have quite a few books, and while I’d love to have a nice, big built-in to fit them all in perfect {still dreaming up plans for that!} for now I have to get by with a smaller bookcase. It is deep, however, so I utilized that and have two rows of books on some shelves. I used cereal boxes covered in scrapbooking paper to give the back row a boost, so I can clearly see what books are behind there!
4. Remember that your “loss” can be someone's gain. Find creative ways to rid your home of the things you don’t need, and perhaps bring in a few items that you can use.
- We have a great little non-profit store in our area that accepts donations. We enjoy shopping there as well, and have been able to get many items that were needed for a very low price. Donating locally is a great way to help your community!
- Right now the ladies in our church are having a swap. Anyone can bring in items they don’t need any more, in exchange for something you see that you would like to have! I got rid of several items this way, and was able to pick up a couple of craft books in exchange. You could organize this with some friends – it is almost like getting a yard sale experience for free! 🙂
- Selling used items online is very popular these days. Here in Canada we have Kijiji, but Craigslist is the same thing. I was able to sell two large bags of scrap fabrics that I couldn’t use – giving me some spending change to fuel my fabric addiction, ha!
- Simply give. Do you know of a family that is struggling or could just use some encouragement? It is not a bad thing to give away your used items. It doesn’t need to be a big charity event, just a simple, “I can’t use this anymore, could you?” will be sufficient. Clothing especially is something that can be given away! Just be sensitive to the needs of the other person…don’t give things that are junk or that they won’t be able to use. You can still give from the heart, even if the item is used.
The Bible commands us to be good stewards of the things God has given us, and I believe that includes taking care of even the small things in our life. The better we care for our things, the longer they will last us. What methods do you have to organize or purge your things? Anyone else have the challenge of a small space to work with?
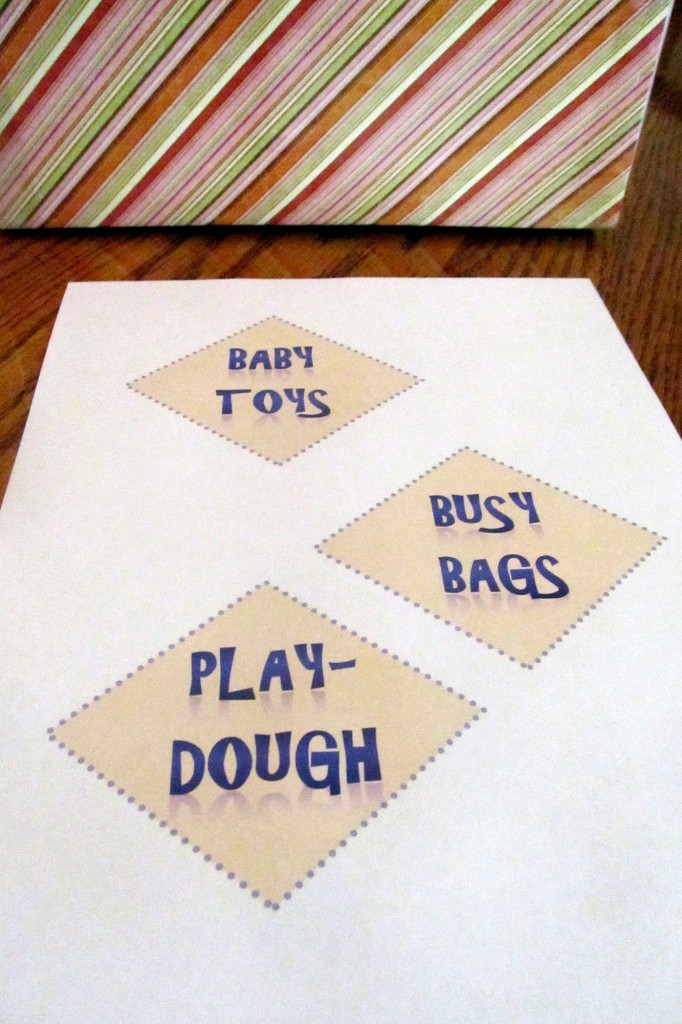
Easy & Frugal Organization for Children’s Activities or Craft Supplies
I love to be organized. I like everything to have a place so I can easily find and access it when I need it. I really like all of the pretty boxes and organizing systems that you can find in the stores today. However, most of them cost a pretty penny. When you are living on a very tight budget, it’s hard to squeeze out anything extra for something aesthetic.
Last year when I wanted to re-organize my children’s closet, including the numerous art & craft supplies that we own, I really wanted everything to look pretty. But I didn’t have any extra money to spend on the project. That’s when I came up with an easy and frugal method of organizing and displaying all of the supplies in the closet.
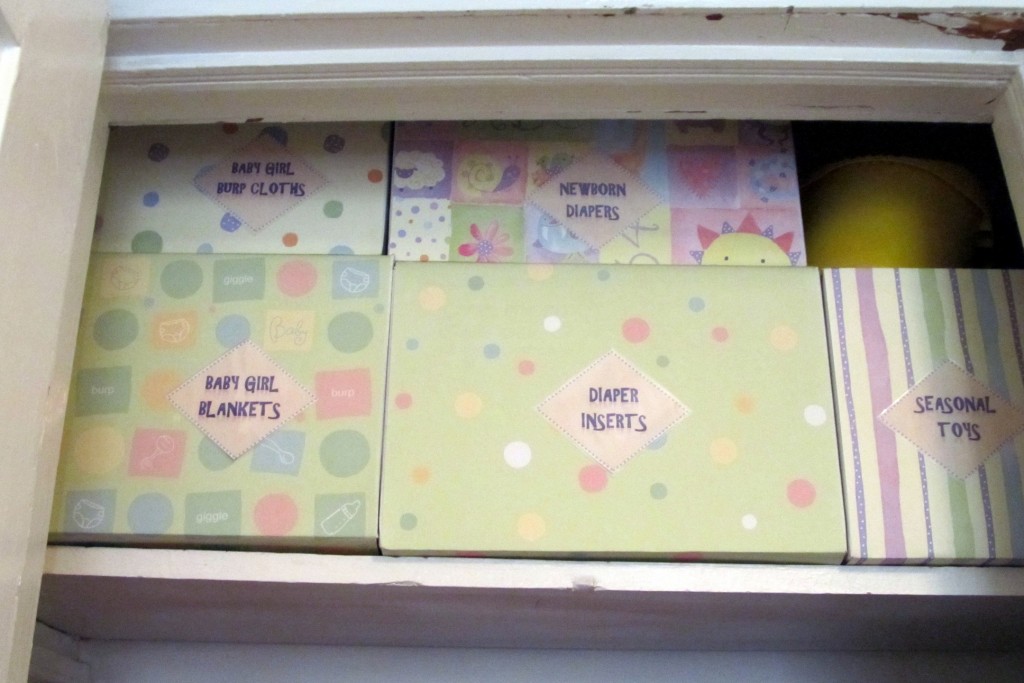
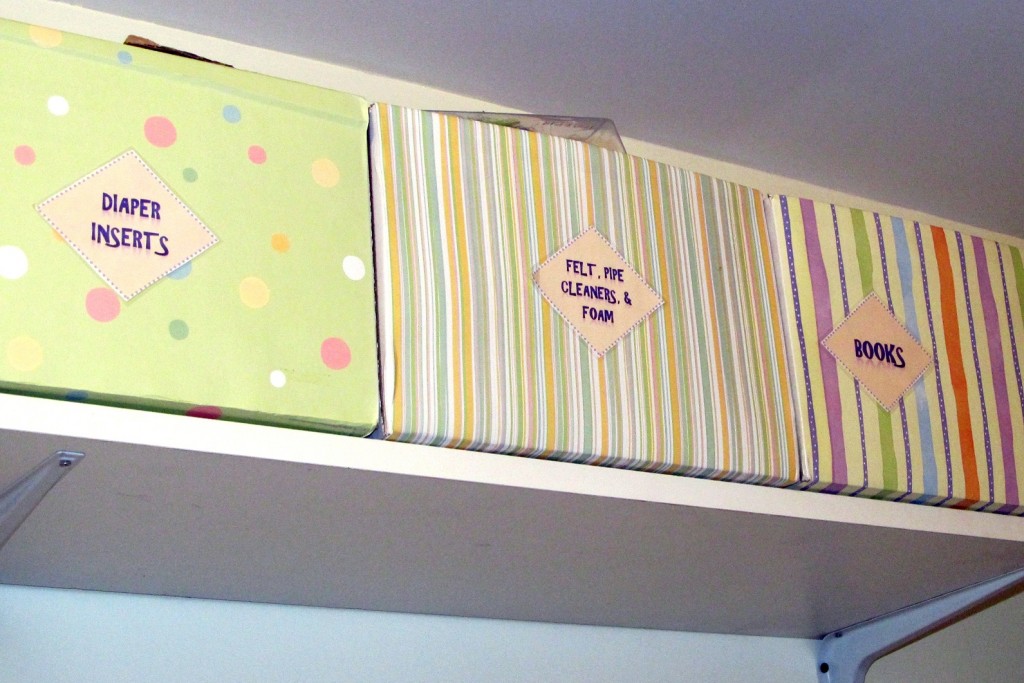
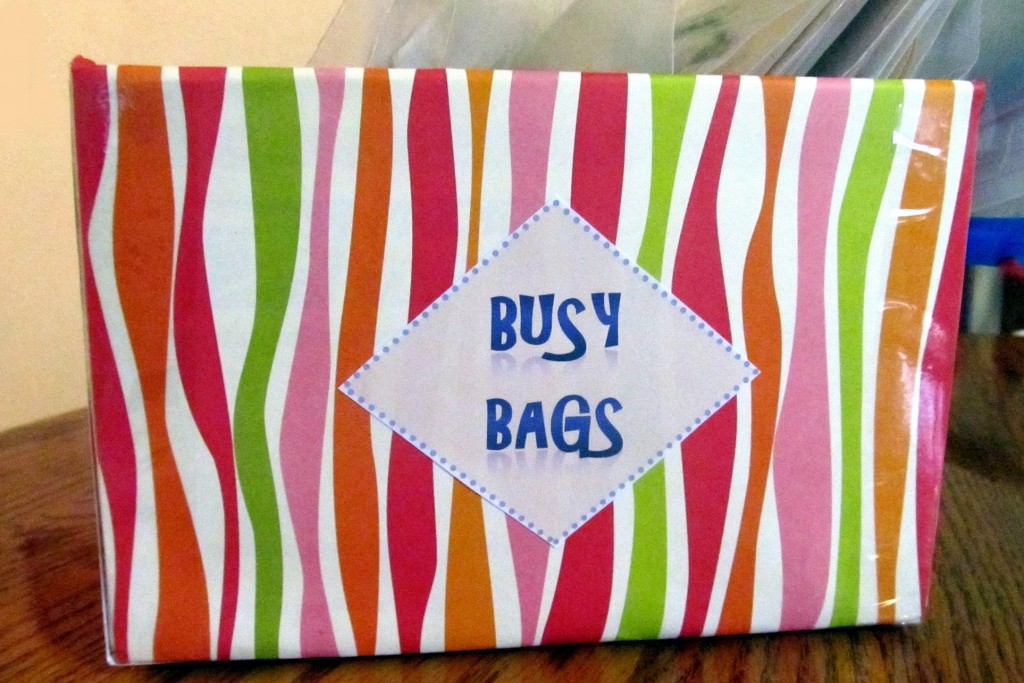
Basically, I used boxes of the same size and covered only the front of the box with scrapbooking paper. I then made matching labels for each box so that I could quickly know the contents. The boxes stacked neatly and looked nice because they were all the same size. The decorative paper made them look pretty and match the room decor. Since only the front of the box could be seen when they were stacked on the shelf, covering just one side of the box in pretty paper was quick, easy, and economical.
I used some boxes that were leftover from a home internet business. However, I have seen boxes for 50 cents or $1 at Lowes or Wal-Mart.
Here are the supplies you will need:
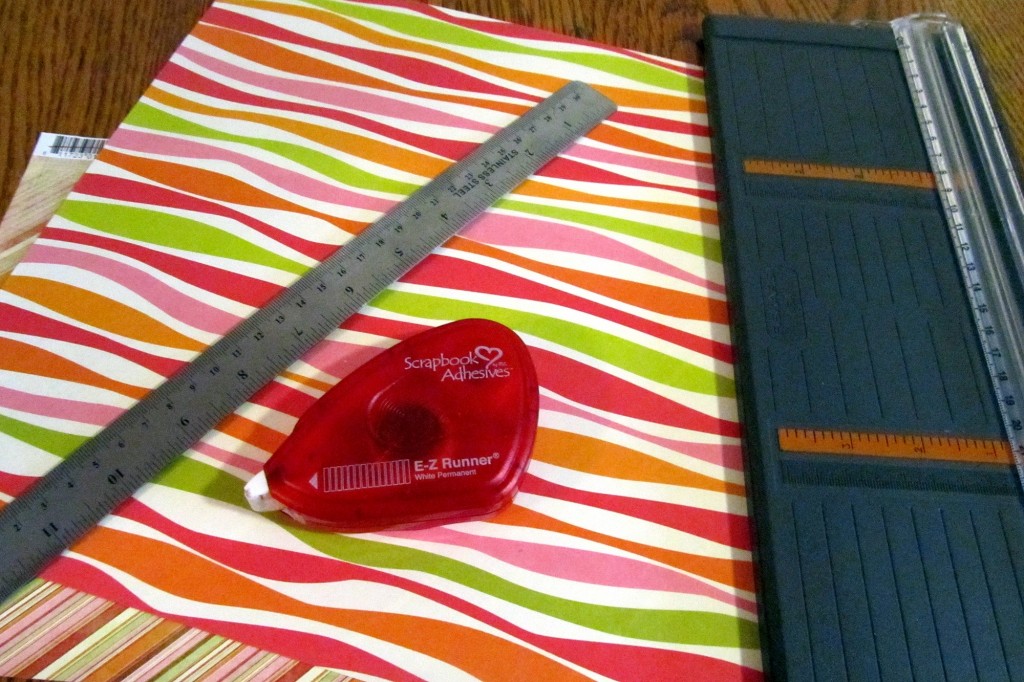
- Scrapbooking/decorative paper. You can wait for a sale or use a coupon to get these for 10-25 cents per sheet. As a paper crafter, I had a lot on hand already. The 12×12 size would be best.
- Adhesive – I used scrapbooking adhesive, but you could also use hot glue or just packaging tape
- Ruler
- Paper cutter
Instructions:
Using the ruler measure the width of your box. Cut your scrapbooking paper to the width of the box using the paper cutter. Now place the paper on the box, and fold the excess paper to overlap the flap of the box on the top, and the bottom of the box. Remove your paper and add adhesive near the fold lines and all of the edges. Place the paper back on the box, folding the ends around the box, and adhere. I sometimes add some clear tape to the edges of the box if I am planning to use it frequently. This keeps the paper edges from getting ruffled. Depending on the strength of your adhesive, you may want to tape the ends of the paper on the box flap and box bottom to ensure they stay in place.
I create custom labels using this tutorial from IHeartOrganizing. I use Microsoft Word as opposed to Excel. It’s very easy to create a shape, customize the color & border, and add some word art. After printing you can laminate the label for added durability.
That’s it! You have just created visually appealing storage boxes for $1-$1.25 each (or less), as opposed to $3-5 each for plastic bins, or even more for fabric storage bins.