5 Common Causes of Fatigue
Are you feeling fatigued day after day? Perhaps you may laugh, thinking that it's normal to feel that way, but would you be happy to know that you don't have to feel exhausted all the time? I understand that you work hard at your responsibilities, and being tired is a natural result of that. Fatigue – being constantly, overwhelmingly exhausted – is not natural.

When I placed myself under the care of a doctor of functional medicine to overcome some deeper health issues (which included fatigue), I learned invaluable information from my doctor as well as from my own research.
I have discovered some of the basics that all women need to prioritize in their lives in order to achieve a greater energy level.
Did you notice that I said “basics”?
Some of the things I could have done to combat the fatigue were so simple that I looked right past them.
Perhaps you are neglecting them, too.
If you’re fighting fatigue day after day, consider whether or not these 5 contributors to fatigue are present in your life. When you eliminate them, you will most likely feel an incredible boost in your energy level.
{Read my entire guest post at The Humbled Homemaker}
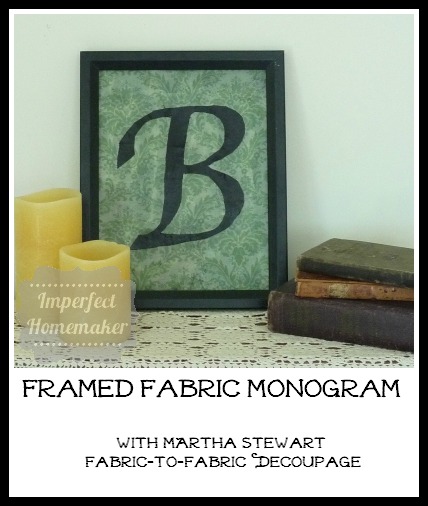
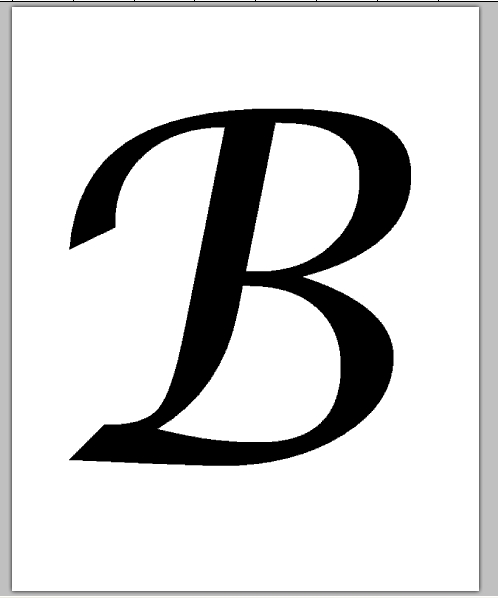
Framed Fabric Monogram
Disclosure: The materials for this Framed Fabric Monogram as well as compensation for this post were provided by Martha Stewart/Plaid Crafts and Blueprint Social.
You all may know by now that I'm not the most artistic person in the world. However, I still enjoy beautiful things and crafts as much as any other woman. It's just that anything I do has to be pretty much dummy-proof or I will find some way to mess it up!
When I found out that I would have the opportunity to try out items from the Martha Stewart Decoupage line, I immediately thought of an easy project that even someone like me could complete.
First, here are all the goodies I recieved:
 There were so many craft possibilities with all of the lace trims, fabric cutouts, and different finishes of decoupage. All of the Martha Stewart decoupage products are available at Michael's.
The supplies I used for this craft were:
- Martha Stewart fabric-to-fabric decoupage (I used the matte finish)
- Martha Stewart decoupage brushes
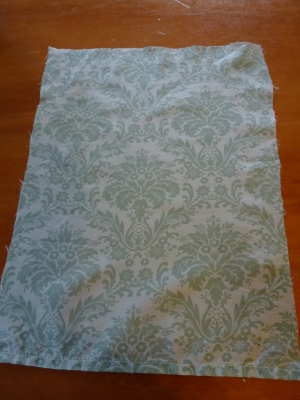
- Fabric of choice (I used a sheet I found at the thrift store)
- Card stock
- Picture frame
Here's how I did it:
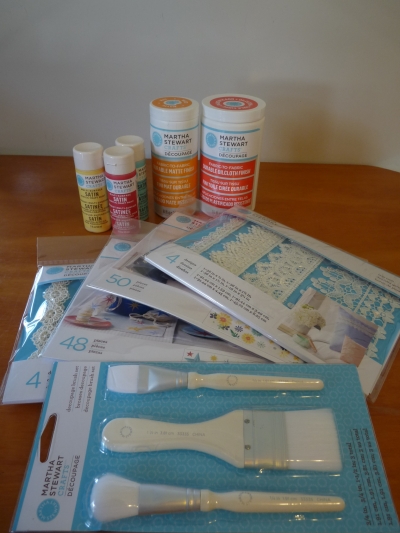
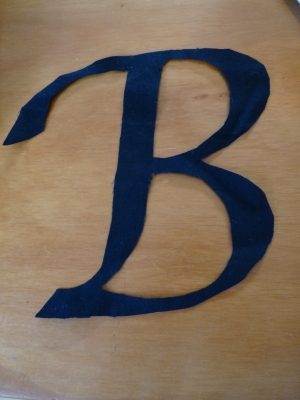
First, I found a font that I liked and printed it off on the computer.
I cut it out and used it as a template to cut out an identical piece of black fabric.
Next I used a piece of card stock as a template to cut my base fabric the right size.
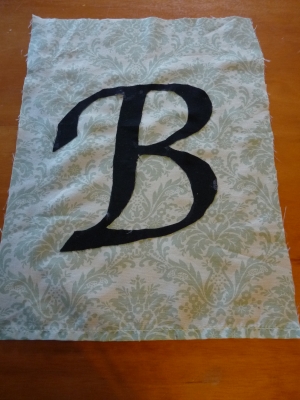
I applied a layer of decoupage on the back of the monogram and adhered it to the center of my base fabric.
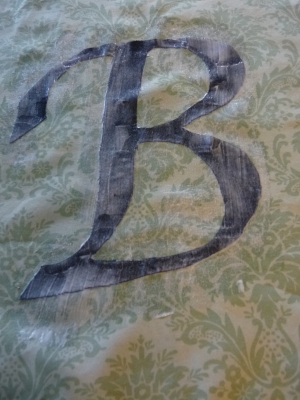
Then I applied several coats of decoupage over top of the whole thing to seal it. I did this several times, giving it a couple hours of drying time in between.
Finally, I adhered the entire thing to a piece of card stock and stuck it in a frame. I opted to leave it without the glass so that the texture of the fabric could be more prominently displayed. (By the way, this is a great way to use thrift store frames that are missing their glass!)
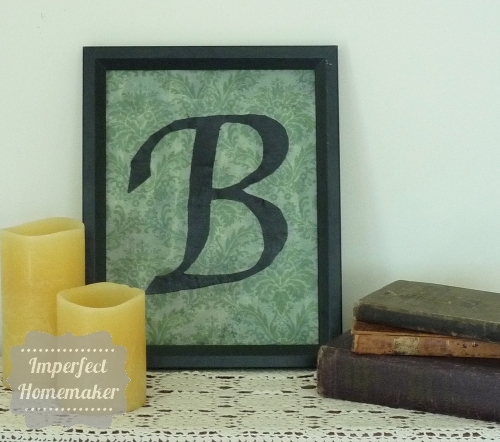
That was it! Done quickly and easily! If I can do it, anyone can!
Be sure to follow Plaid for lots more ideas:
Blog :: Facebook :: Twitter :: Pinterest
You can also check out what other bloggers are doing with the Martha Decoupage products:
What I Didn’t Know as a First Time Mom
This post brought to you by HUGGIES. All opinions are 100% mine.
When this new little one arrives, she'll round out the number of our children to an even four.
I remember how different things were when I had my first. I had read all the books and listened to all the advice, and I thought I had this thing all figured out. Now I look back at my first-time mom self and laugh. There were so many things I didn't know.

- I didn't know that I'd feel like I had been run over by a truck for the first six weeks.
- I didn't know how badly my back would hurt when I tried to bend over the bed to change diapers. (We didn't own a changing table. The know-it-all baby books said it wasn't really necessary.) It took me a while to figure out that getting down on the floor was actually easier.
- I also didn't know that changing said diapers on bed would immediately trigger an irresistable urge in that sweet little baby boy to wash my sheets for me.
- I didn't know that in my sleep-deprived state I would be too tired to care about why the sheets were wet and that I'd sleep on them anyway…with a towel on top of course.
- I didn't know that it would be okay to go to a friend's house when I was invited…even if it was past the baby's bedtime or naptime. I just didn't know that newborns can adapt wherever you take them. I didn't know how badly I would regret turning down the invitation to relax with friends.
- I didn't realize how quickly the newborn phase would pass, how quickly he would grow.
All new moms will experience times when they realize, “I didn't know this is what it would be like!” That's why The Mommy Center is helping new moms to navigate those first few months by equipping moms with everything from baby essentials to advice from moms who have been there before. They'll show you the ropes and tell you whether their favorite brand was HUGGIES® Little Snugglers Diapers, HUGGIES® Pure & Natural Diapers, or HUGGIES NATURAL CARE® Wipes. They'll help you find great values on the products that will be most helpful to you.

No matter how tiring or uncomfortable all of those “new mommy moments” have been, I can look back and say emphatically, “They were all worth it!!!”

Back to School With Crayola {Win a $25 Gift Card!}
Disclosure: The Crayola product, information, and additional gift pack have been provided by Crayola. As always, all opinions are 100% my own.
I was contacted recently by Crayola to see if I would like to shop for Crayola products during our back-to-school shopping. Of course I said yes!
I thought back to my own childhood and the fond memories of being so excited to get that 64-count box of crayons with the sharpener on the back. Then there was the day I was given an entire box full of paper and various types of Crayola markers, pencils, and crayons (some of them were even glittery!) Yes, those were exciting times, and I thought I could expect the same thing when I headed out for our big shopping trip.
I was right…but I was also wrong! Not only does Crayola still make all those same great products from my childhood, but they have also added so much more!
I did my shopping at good old Walmart. With 3 small children to get in and out of the car, I try to consolidate my shopping to one store as much as possible. Not only were there various Crayola products interspersed throughout the school supply aisles, there was also an entire aisle in the craft section that was chock full of Crayola products. My jaw just about dropped when I turned the corner and saw it.
Our Walmart trip was cut short before I could look at and purchase everything I was hoping to. This pregnant mama just got completely worn out from walking, so I decided to head home and finish my shopping online.
Here's what I ended up with before we left Walmart, though:
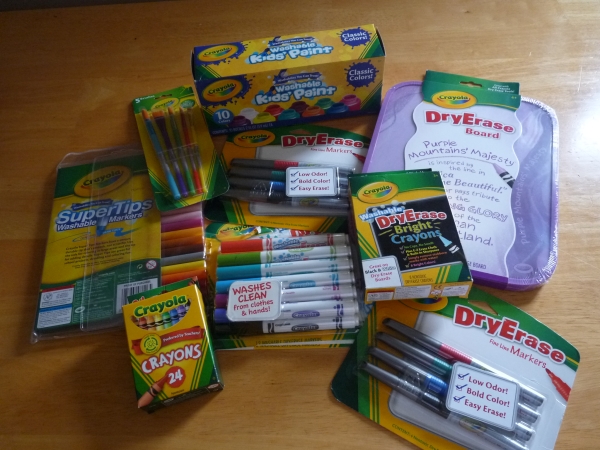
- Paint and paintbrushes
- Supertips washable markers
- A good old-fashioned package of crayons
- A dry-erase board
- 2 packs of fine tip dry erase markers
- A 12-pack of washable dry erase markers
- Dry erase crayons
All of these are practical supplies that we will use regularly in our home school. The paint, paintbrushes, and markers are for art class. The crayons are for my daughter's pre-school activity sheets. (And you can't beat 50 cents! I'd rather pay 50 cents for Crayola than 25 cents for the off-brand. There's a big difference.) My son already had his own dry erase board for various activities, but when I saw that Crayola had this purple one, I got it for my daughter (she loves purple!) The washable dry erase markers are for my own sanity (as opposed to non-washable.) Since I was at Walmart, I was able to price-match those for a lower price. I also used a coupon for $1 off 2 dry erase products that Crayola had on their Facebook page. (They have had a number of different printable coupons available throughout the back-to-school season.) The fine tip dry erase markers are for worksheets that I want the kids to re-use. I put the worksheets in sheet protectors and they do them with the dry erase markers so they can erase them and do them again later. The dry erase crayons are for my 2 year old. That way he can do work on his dry erase board like the big kids, but I won't have to worry about him drawing all over his clothes with markers.
When I got home I hopped on to Walmart.com to finish the rest of my shopping.
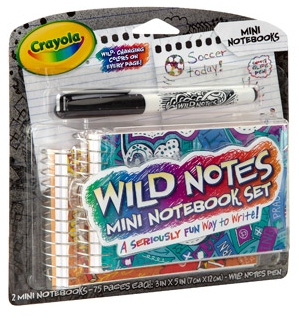
Crayola Wild Notes Notebook set – the pens change color as you write! How fun!
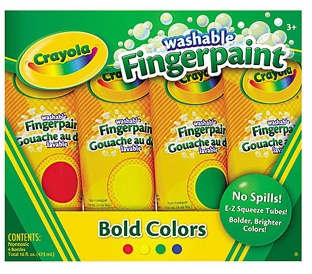
Fingerpaint – more art class fun
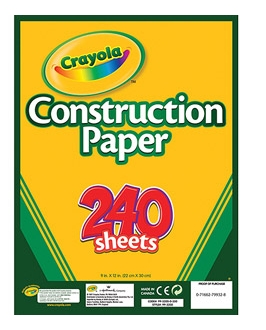
Construction paper – my kids go through this stuff like crazy!
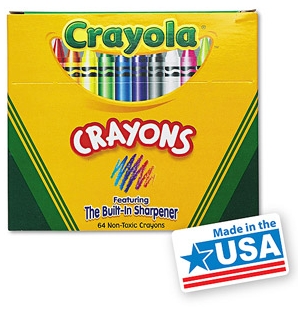
Yup – the 64 pack with the sharpener on the back. My kids need to know how fun it is to have this! 🙂
You can see I'm a very practical person, and don't really go for the gadgety type stuff, but it is amazing to see all the cool stuff Crayola has come up with! Just take a look at all their newest products and you'll see what I mean!
It also wouldn't be a bad idea to follow them on Facebook and Twitter. (Remember those coupons I was talking about?)
Win a $25 Visa Gift Card to purchase your own Crayola products!
Entering is easy as pie! Just click the enter button in the rafflecopter form below!
Personalized Back to School Supplies with Duck Tape®
This post brought to you by Walmart. All opinions are 100% mine.
I think I've been more excited about school starting than my kids have. I have made school supply lists about a million times. We finally had the chance to get out to Walmart this week and actually buy the stuff on the list!
One of the things I needed was binders for the kids to keep their seatwork assignments in. But I'm cheap. It kills me to pay 4 or 5 dollars for a binder when the one for 92 cents does the same thing. The only problem is that the cheap ones are boring and drab.
It was so easy to fix that with Duck Tape®!
First we accented the pockets of J's binder with the camouflage he had picked out and added his initials to the front. So quick and easy, but he couldn't have been more thrilled!
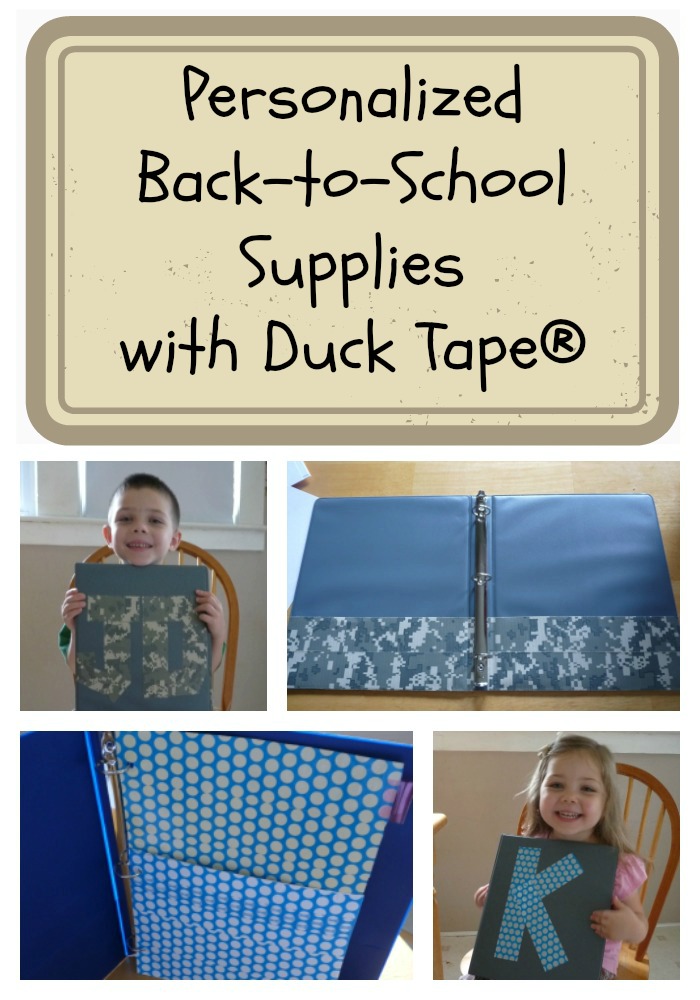
For miss K, we used the polka dot tape she had picked out and made a pocket to hold all the itty bitty pieces from her various preschool activities. This will go in her notebook, which of course we had to personalize with her initial too.
I'm sure these projects aren't the only thing they'll be using their Duck Tape® for! They have been cutting pieces off and sticking them everywhere! I guess since their dad uses it as bandages, they figure they can use it for pretty much anything too!
Have you made your inevitable trip to Walmart for school supplies yet? You might want to consider grabbing a couple rolls of Duck Tape® too! It's an easy way to make a happy kid! buy Duck Tape at Walmart
Need more ideas for using your Duck Tape® (besides having your kids stick it in random places all over the house)? Follow @TheDuckBrand for tons of creative inspiration!
Healthy Eating 101: Where Do I Start?
Are you trying to make healthier changes to your eating habits, but just aren't sure where to start? I know how you feel. I've been there.
It's honestly been quite a long road since I started making changes. And that's okay. It may take a while for you too. Don't sweat it. Progress is still progress, and I'm happy for any that you make.
So…the big question: “Where do I start???”
Many times when you begin reading information on food – what's good for you, what's bad for you, what will outright poison you – it can become overwhelming very quickly and you may want to quit before you even begin. It's easy to say “This is too hard. What's the use?”
You need to start out small. Just choose one thing to research and come to your own conclusion. This is one aspect you shouldn't skip. If you haven't come to a certain conclusion on your own about eating/not eating a particular thing, you will quit eventually. When you start feeling the pinch in your wallet, or when you start spending extra time in the kitchen making things from scratch, you will ask yourself, “Why am I doing this? Oh yeah, because some crazy lady on a blog somewhere said it's good for me.” That's not going to keep you going when things get tough.
Here's my recommendation for a good starting place:
Change one thing that you consume the most.
Do you eat fast food a lot? You probably already know that eating that kind of food is not good for your body, but if you need some more motivation to stop, start doing some research on that particular topic. Before long you will be easily making the decision not to swing by for that hamburger.
Maybe you eat breakfast cereal like it's going out of style. Did you know that even the “healthy” kinds are chock full of food additives (many of which are not even legal in other countries because of their detrimental effects on the human body)? Start your research there.
Are PB&J's the normal lunch in your family? Take a look at the ingredients in the bread, peanut butter, and jelly. Research them.
Whatever it is that you find yourself feeding yourself and your family on a very regular basis is what you should focus on changing first.
What if I don't like what I find in my research and I know I need to change a particular area? How do I change it?
First, you may be able to completely throw out a food from your diet altogether. If you get rid of the packaged cookies and chips, you'll be forced to find something else to snack on. Fruits and veggies, cheese or yogurt, or nuts can do the trick.
If a particular food is something you feel you can't live without, you can almost always replace it with a whole-food version of the same thing.
Fast-food burgers can be replaced with homemade.
Breakfast cereal can be replaced with homemade granola.
Peanut butter sandwiches can be made healthier with homemade bread, homemade peanut butter, and homemade jelly. If that's just too much of the word homemade, and you're overwhelmed at the thought of doing all that, then see if you can search out a store-bought compromise. (In our house, I buy a natural peanut butter without added ingredients, we do honey instead of jelly, and that only leaves me with the bread to make. If I'm still feeling too overwhelmed to make the bread, we use apples to dip in the peanut butter, and *gasp!* sometimes I still buy store-bought bread as long as it contains no HFCS. It's still not a perfectly healthy solution, but it's better than the alternative, and remember, this is all about finding a balance. Don't overwhelm yourself. Do what you can and don't get gray hair over what you can't do.
So, here's the recap from today:
1. Figure out the one thing that you and your family consume the most.
2. Research its effects on your health to solidify your decision to make changes.
3. Get rid of the offending food or find a whole-foods replacement.
That doesn't seem so hard, does it? Now go get busy!